Chicken and Choy Sum Udon Noodles

Chicken and Choy Sum Udon Noodles

Chicken and Choy Sum Udon Noodles

Chicken and Choy Sum Udon Noodles

Chicken and Choy Sum Udon Noodles

These noodles are great for a quick mid week meal. With any ‘stir fry’ you can add whatever ingredients you like, no matter how little you have so it is great for using up left over vegetables. Udon noodles originate from Japan, are made from wheat flour, and can be bought handy in ‘straight to wok’ individual servings. As well as stir-frying you can also put them into a noodle soup so they are very versatile! Leave out the chicken or substitute with fried tofu for a filling vegetarian alternative.

Ingredients: (serves 4)

  • 3 small packets of udon noodles
  • 3 boneless chicken thighs (diced)
  • 1 white onion (sliced)
  • Small bunch of Choy Sum (chopped, separating the leaves and the stalks)
  • 2 tbs light soy sauce
  • 1 tbs sesame oil
  • Small handful of cashew nuts (lightly crushed), to serve

Method:

  • Stir-fry the chicken thighs in a dry wok, or deep frying pan, there should be enough fat from the chicken so no extra oil needed
  • Add the white onion and stir-fry until translucent
  • Add the stalks of the Choy Sum and the noodles, separating them out so they don’t clump together
  • Add the soy sauce and sesame oil, stir fry until the noodles are warmed through
  • At the last minute add the leaves of the Choy Sum, they will wilt in the residual heat
  • Sprinkle with cashew nuts when serving to add additional crunch
Chicken and Choy Sum Udon Noodles

Chicken and Choy Sum Udon Noodles


Braised Duck in Cucumber Cups

Braised Duck in Cucumber Cups

Braised Duck in Pickled Cucumber Cups

This is a canape version of the Duck with Hoi Sin Sauce in Pancakes often found in your local Chinese restaurant. Created as part of an ‘Asian Inspired’ Afternoon Tea. I’ve previously used a similar recipe for Braised Duck with Spring Onion Pancakes, it’s a healthier version of crispy roast duck as it does not involve deep frying. This canape version is a little fiddly but looks impressive.

Braised Duck in Cucumber Cups

Braised Duck in Cucumber Cups

Ingredients:

  • 2 duck leg quarters
  • 4 star anise
  • 4 cloves
  • 100 ml dark soy sauce
  • 50 ml of Chinese rice wine
  • 100 ml water
  • 2 tbs five spice powder
  • 2 tbs cinnamon powder
  • 1 tsp white pepper
  • 4 inch piece of root ginger smashed up
  • Large cucumber
  • 100 ml rice wine vinegar
  • 100 ml water
  • 2 tsp sugar
  • Hoi Sin sauce (to serve)
  • Spring onions, julienne (to serve)
Braised Duck in Pickled Cucumber Cups

Braised Duck in Pickled Cucumber Cups

 Method:

  • Duck: In  a large sauce pan, put all the ingredients for the duck together and bring to a slow boil. Simmer the duck legs for 10 minutes with the lid on the sauce pan and then leave to braise in the pan. The residual heat will finish off the cooking so don’t take off the lid! Once completely cooled, leave to one side until needed (Do it the day before and leave the whole pot in the fridge so the meat takes on even more of the lovely flavors)
  • Cucumber: Peel the cucumber and cut into two inch cups. Scoop out most of the watery seeds in the middle but leave the bottom intact so the filling doesn’t fall through. Combine the vinegar, water and sugar in a large shallow dish and put the prepared cucumber cups in to pickle. Leave for up to 1 hour, but longer if you want it to be really sharp!
  • To assemble:
    • Take the duck out of the braising liquid and shred the duck meat finely.
    • Pat the cucumber cups dry and assemble onto a serving dish.
    • Spread a thin layer of Hoi Sin Sauce in the bottom of each cucumber cup, then stuff a big pinch of duck into the cup.
    • Finish off with a small dollop of Hoi Sin sauce and the spring onions.
'Asian Inspired' Afternoon Tea

‘Asian Inspired’ Afternoon Tea

As mentioned above, I served these Braised Duck in Cucumber Cups as part of an ‘Asian Inspired’ Afternoon Tea where the traditional sandwiches were replaced with Asian style savory canapes. I also made ‘Smoke Salmon and Avocado Sushi’, ‘Thai Prawn Noodle Salad’ and ‘Chicken and Shitake Mushroom Potstickers’. Recipes to follow shortly! 🙂

Black Sesame and Pear Cake

Black Sesame and Pear Cake: Clandestine Cake Club meet No.3

Black Sesame and Pear Cake

Black Sesame and Pear Cake

This cake club comes around so quickly! But I love it! 😀

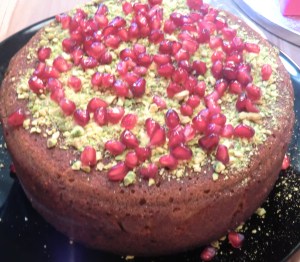
My ultimate pastime activity; baking, eating and talking about cake! If this is your first time hearing about the Clandestine Cake Club, you must visit their website and sign up to a local club immediately… This was my third meeting with previous bakes being the Spanish Orange and Almond Cake and the Pistachio, Cardamom and Yoghurt Cake.

Clandestine Cake Club Spread

Clandestine Cake Club Spread

The theme of this club meeting was ‘Think Outside the Box’ due to the lovely people of Selfpackaging.com sponsoring the event. When thinking about the type of cake to take along, I was really stuck with the theme. I’m not a fan of making cakes that taste strange and I’m good with sugar paste either… So I decided to go with my favourite or favourite ingredients: Black Sesame! 😀

Black Sesame isn’t widely used in cooking, unless you are Asian! So I thought that it would be a new flavour for most people. (Any excuse to use black sesame! :))

Black Sesame and Pear Loaf Cake

Black Sesame and Pear Loaf Cake

Luckily for me I came across a recipe for Black Sesame and Pear Cake which makes use of pears in a traditionally western way of baking, so it was a good way of introducing the flavour without being too ‘out there’!

What I learnt from this recipe was that it rises quite a bit (mine bubbled right over the sides of the tin all over the oven) and it is very dense so needs a long bake in a lower temperature. I also had to cover the cake part way through cooking with foil as it was browning very quickly.

Black Sesame and Pear Loaf

Black Sesame and Pear Loaf

Due to the long baking time, the edges became quite crisp so I snapped them off. The texture of the crisp sugary top and the moist cake was quite nice.

Pear and Black Sesame Cake

Pear and Black Sesame Cake

This cake went down quite well at the cake club meeting. Several people asked me where they could buy black sesame seeds from. (A good sign that!) There was also very little left at the end of the evening (Good sign number 2!)

It may not be pretty, but it tasted good! I think my forte is for flavour rather than looks in baking… 😀

I also wanted to share with you a couple of highlights of mine from the evening…

Pistachio, Polenta and Elderflower Cake

Pistachio, Polenta and Elderflower Cake (Looks gorgeous doesn’t it?!)

I may be a little biased as this cake was made by my cousin, but how beautiful is this?

Bento Box Cake

Pandan Cake with Lychee Butter cream

This cake was a work of art as well as being delicious! What amazed me was that the baker (Steven) had just bought some flavours that he’s never used before from a Chinese supermarket and baked a cake with it. He also made these adorable pandas out by making marshmallow from scratch! What a legend!


Tofu Stir Fry with Chicken and Chorizo rice

Chorizo and Chicken Rice with Tofu and Vegetable Stir Fry

Tofu Stir Fry with Chicken and Chorizo Rice

Tofu Stir Fry with Chicken and Chorizo Rice

I have previously posted a recipe for Macau Portuguese Baked Rice. This time I have used the same flavour combinations but simplified the recipe for a quicker meal that takes less than 30 minutes to put together and serve for a mid week dinner. Refer to the previous recipe, but skip the cheese and boiled eggs so the rice is only steamed on the stove. I poached some chicken with cloves, bay leaves and garlic then left it in the fridge, for when I was cooking this dish. However any left over roast chicken will work too.

Chorizo and Chicken Rice

Chorizo and Chicken Rice

To go with the rice, I quickly stir-fried some ready cooked fried tofu with some chopped leeks, mange tout, celery and mushrooms. These are basically the vegetables I had in the fridge/freezer so any you have to use up could work too.

Tofu Stir Fry

Tofu Stir Fry

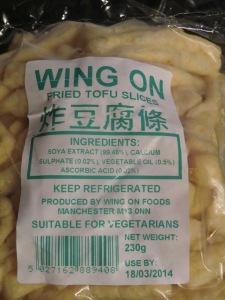
Fried tofu is a great vegetarian staple to have in the fridge for a quick and nutritious meal. They can be bought in bags in Asian supermarkets (look in the fridges) or you can deep fry your own tofu.

Fried Tofu Sticks

Fried Tofu Sticks

To add flavour to the tofu and vegetables, I used a couple of table spoons of vegetarian stir-fry sauce (an alternative to oyster sauce), light and dark soy sauce, and sesame oil. The tofu soaks up all the flavours like a sponge, so you can add what ever you like to the sauce. I added a few splashes of water too as the dish was a little too dry. Remember not to over cook the vegetables as you’re looking for the crunchy texture to contrast the soft tofu!

Tofu Stir Fry with Chicken and Chorizo rice

Tofu Stir Fry with Chicken and Chorizo rice

This tofu dish can be served with plain rice or egg fried rice for a filling vegetarian meal.

If you are avoiding gluten, double check the label of the chorizo and cooking sauces for gluten. Gluten free versions can usually be found!

GF and Vegan: Sweet Potato Vermicelli with Vegetables in Blackbean Sauce

Sweet Potato Noodles with Vegetables in Blackbean Sauce

Sweet Potato Noodles with Vegetables in Black Bean Sauce

Have you ever heard of Sweet Potato Vermicelli?! Well I’ve had this packet of dried noodles in my cupboard for about 2 years and had forgotten all about it until today. I’m not even sure why I bought it in the first place! Maybe because it is something I hadn’t tried before?  When the noodles are dry they are grey but once cooked they become clear. There are only two ingredients to these noodles; sweet potato flour and water!

Sweet Potato Vermicelli

Sweet Potato Vermicelli

After over-indulging in pancakes for Shrove Tuesday, tonight’s dinner really needed to be healthy and nutritious! So I dug out all the vegetables from the fridge and decided to make a stir fry in black bean sauce. Fermented black beans can be found in Chinese supermarkets in bottles. Ideally you would use the dried black beans rather than the bottles of ready made black bean sauce, however if you want to make this recipe super quick and easy then feel free to use bottled sauces. 

Unfortunately the packet of noodles didn’t have any cooking instructions so I decided to guess it. In hindsight, I should have just looked it up online as there are plenty of websites offering advice! Lessons learned and all that… 🙂

Sauce ingredients

Sauce ingredients

Ingredients

  • 1 packet of Sweet Potato Vermicelli
  • 3tbs fermented blackbeans
  • 4 cloves of garlic (chopped)
  • 1 tsp sea salt
  • 0.5 tsp sugar
  • 1 tbs light soy sauce
  • 1 tbs dark soy sauce
  • 1 tbs sesame oil
  • 1 tbs vegetable oil
  • 1 tbs corn flour
  • Water
  • Stir frying vegetables (I used broccoli, courgettes, carrots and leeks)
  • Coriander (I had a bunch of stalks left over so used them)
Black Bean Sauce

Black Bean Sauce

Method

  • Boil the noodles for 5 minutes (you should then ‘shock’ them in cold water and then coat in sesame oil so they don’t get too sticky)
  • Blanch vegetables that need to be pre-cooked and set aside (I threw them in with the noodles)
  • Mix the black beans, garlic, sugar, salt, soy sauces, salt and sesame oil together in a bowl
  • Heat up the vegetable oil and and stir fry the leeks and courgettes
  • Add pre mixed black bean sauce ingredients to the pan and stir fry for a couple of minutes
  • Add water to create the gravy, thickening with the cornflour (to avoid lumps mix the cornflour with water to create a paste before adding)
  • Add the part cooked vegetables and coriander into the sauce and stir around then add the noodles, tossing it all together so all noodles are coated with the sauce
Sweet Potato Noodles in Black Bean Sauce

Sweet Potato Noodles in Black Bean Sauce

This recipe makes enough for 6 people and is super filling! The Sweet Potato noodles really soak up a lot of the sauce, so the dish ends up quite dry but tasty. I think I over cooked the noodles as they were quite sticky! This may also be because I didn’t ‘shock’ them with cold water to stop the cooking process.

Overall I’d say that the sweet potato vermicelli is a tasty a alternative for people who are looking for an alternative to wheat noodles! And since it is a stir fry, very quick to cook for a mid-week meal…

I’ve also just realised that my soy sauces aren’t gluten free! So please buy GF versions if needed! 🙂

Green Tea and Black Sesame Marble Cake

Green Tea and Black Sesame Marble Cake

Green Tea and Black Sesame Marble Cake

image

Green Tea and Black Sesame Marble Cake

Green Tea and Black Sesame Marble Cake

Green Tea and Black Sesame Marble Cake

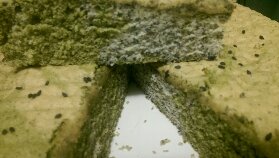
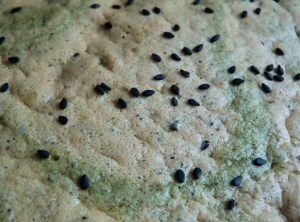
After gaining a little more confidence in my ‘cake marbling’ skills, I decided to attempt a ‘Chinese’ version for my family using the classic combination of Green Tea and Black Sesame! I have previously posted ‘Green Tea and Black Sesame Swiss Roll‘.

Using a ‘Victoria Sponge’ recipe that my mum passed onto me, I have tried to create a lighter version of the traditional ‘marble pound cake’ by using a ‘chiffon cake’ style method. This basically involves getting as much air in the eggs as possible and then folding in a small amount of flour to hold it all together. There is also less sugar which is typical of Chinese cakes.

Green Tea and Black Sesame Marble Cake

Green Tea and Black Sesame Marble Cake


Ingredients

  • 5 Medium Eggs
  • 120 g Caster Sugar
  • 90 g Self Raising Flour
  • 30 g Cornflour
  • 35 g Olive Oil
  • 2 tbs Ground Black Sesame Seeds
  • 1 tbs Matcha Powder (Food grade Green Tea Powder)
  • a pinch of black sesame seeds for decoration


Method

  • Beat the eggs and sugar together until pale and to ‘ribbon texture’
  • Sift in both flours and fold into the egg mixture (avoid mixing as it deflates all your hard work in getting the air in!)
  • Pour in the oil and stir until just combined
  • Pour half the batter into another mixing bowl
  • Fold in the ground sesame seeds into one half the batter and the matcha powder into the other half of the batter
  • Now carefully pour both batters into a lined and greased cake tin. This is difficult with this cake batter as it is very runny! The way I did it was to pour the batters into the corners and let them run into the middle so you get a chance to at least get 4 definite colour blocks.
  • Finally swirl a skewer or knife through the mixture a couple of times to create the ‘marble’ effect.


Matcha and Black Sesame Marble Cake

Matcha and Black Sesame Marble Cake

This cake was a hit with my family, not too sweet and very light in texture. A definite keeper!

Chocolate and Vanilla Marble Cake

Marble Cake

Marble Cake

On my recent adventure to the Clandestine Cake Club I came across two ladies who made ‘marble cakes’ and I found myself wondering why I have never attempted to make one? I had made a fairly low maintenance Pistachio, Cardamom and Yoghurt Cake which is a fairly straight forward all in one method with a lime syrup to drizzle on top. I had a chat with a fellow baker who had made a delicious Chocolate and Orange Marble Cake and she reassured me that the secret to marbling is that ‘less is more’. So today I decided to give it a shot!

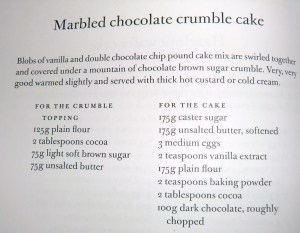
Marble Cake recipe

Marble Cake recipe from Dan Lepard’s ‘Short and Sweet’

I used a Dan Lepard recipe from his book ‘Short and Sweet’. The recipe is actually for a Marbled Chocolate Crumble Cake but I decided to skip on the crumble since to simplify things for myself. He has posted a similar recipe on his Guardian column which gives brilliant step by step photos to guide you along the way to a perfect marble cake!

Marble Loaf Cake

Marble Loaf Cake

So taking the cake out of the oven, I felt quietly confident that cake would be a success as the top was nicely marbled and you could see the contrasting colours. However one the cake had cooled though to cut through it was a very different story inside! I was obviously not thorough enough with the ‘swirling’ so have ended up with blocks of cake that are either ‘chocolate’ or ‘vanilla’. This may have something to do with my cutting the cake into squares instead of slices though…

Marbled Cake

Marbled Cake

The texture of the cake is a little crumbly on the chocolate bits where it started to fall away a little when I cut it. The vanilla parts were fine though. On tasting a few of the crumbs, I have to say it tastes lovely! Very deep chocolate flavour and not too sweet. I like Dan Lepard’s recipes and will definitely try more from his book!

Mango and Coconut Pudding: A lighter dessert after a heavy Chinese New Year meal

Mango and Coconut Pudding with Fresh Mango and Blueberries

Mango and Coconut Pudding with Fresh Mango and Blueberries

Mango and Coconut Pudding with Fresh Mango and Blueberries

Mango and Coconut Pudding with Fresh Mango and Blueberries

‘Chinese’ and ‘desserts’ don’t sit too well together. Well, that’s not strictly true… What I mean is that ‘Chinese desserts’ are not the same as those from other countries and cultures. We have traditional sweets and baked goods but they aren’t usually eaten at the end of a meal, more as a snack really! At the end of a meal it is much more common to have a platter or pieces of fruit that are shared in the middle of the table or a sweet ‘soup’.

More recently Chinese cuisine has been heavily influenced by other cultures so there are a wider range of ‘fusion’ desserts out there, taking the ideas of other desserts but using more traditionally Chinese ingredients. Think ‘Lychee panna cotta‘ or ‘Green tea Chiffon Cake‘ and you are going in the right direction. (Note to self: try these recipes out!)

Mango Pudding is a family favourite in Chinese Dim Sum Restaurants. It is a light and tasty end to a meal, often served in small portions with coconut pudding and alongside a platter of freshly cut fruit.

For Chinese New Year 2014 celebrations my family had a ‘Korean Barbecue’. This does not involve going out doors in the midst of the British winter to grill chunks of meat, but is a more comfortable indoor activity with a ‘grill’ in the middle of the table and lots of fresh marinated meats/seafood/vegetables for each person to grill themselves. It’s a great way for everyone to get involved in the cooking of the meal and can take place over hours as you slowly grill your food and chat the night away! Very similar to a Swiss ‘raclette‘, just without the cheese!

Korean Barbecue

Korean Barbecue

Korean Barbecue

Korean Barbecue

As you can imagine a lighter dessert to such a rich meal would be a perfect end to the celebrations, so I taking inspiration from a single mango in the fruit bowl I decided to go for Mango pudding! This dessert is more like a jelly than a traditional ‘pudding’. It can be found all over South East Asia and apparently originates from India!

Mango and Coconut Pudding with Fresh Mango and Blueberries

Mango and Coconut Pudding with Fresh Mango and Blueberries

Looking around online for a recipe, I started off with Christine Ho’s Mango Pudding recipe I remembered that my mum had bought me a few packets of mango jelly on a recent trip to Hong Kong. I had no idea what to do with them, so this recipe was perfect! I found Thai version of the recipe that uses coconut milk in place of evaporated milk so decided to combine the two recipes. (Mainly because I had no evaporated milk, but always have coconut milk in the cupboard!)

Mango and Coconut Pudding

Ingredients

  • 2x 80g packets of mango jelly (jello)
  • 200 ml hot water
  • 100 ml cold water
  • 1x 400g tin of coconut milk
  • 500ml of mango purée (tinned)
  • 1 ripe mango
  • Blueberries to decorate (choose any fruit/berries you like!)

Method

  • Dissolve the jelly crystals in the hot water and stir
  • Add the cold water to the jelly mixture
  • Add the tin of coconut milk and mango purée to dissolved jelly and whisk to evenly distribute
  • Pour into jelly moulds/serving bowls/glasses
  • Put a few chopped pieces of mango into each mould/bowl/glass so that you get a nice piece of fresh mango in each mouth-full
  • Chill in the fridge until set (about 2 hours)
  • Decorate the top of each mango pudding with the extra blueberries and mango pieces (or whatever fruit you decided on). Alternatively turn out pudding from the mould and decorate once on the serving plate. Sometimes it is served with extra cream of condensed milk.
Mango and Coconut Pudding with Fresh Mango and Blueberries

Mango and Coconut Pudding with Fresh Mango and Blueberries- Individual mini puddings

As usual I have adapted the recipe used so I can use what I’ve got in the cupboards already. The consistency of the pudding was perfect, just set and not too stiff. Like a silky panna cotta…

However I think that using coconut milk instead of evaporated milk has really enhanced the flavour. Simple yet delicious!

To make a vegetarian and no-preservative version of this recipe, use agar agar and puree fresh mangos. There is no need to add extra sugar if you have really sweet and ripe mangos!

Mango and Coconut Pudding with Fresh Mango and Blueberries

Mango and Coconut Pudding with Fresh Mango and Blueberries- Individual pots

Macau ‘Portuguese’ Baked Rice

Following on from the previous post on Macau/Portuguese Custard Tarts I would like to share with you another dish from Macau, China.

Macau Baked Chorizo and Chicken Rice

Macau ‘Portugeuese’ Baked Chorizo and Chicken Rice

This ‘Portuguese inspired’ dish is well known throughout Macau and Hong Kong but will probably never be found in Portugal! It’s similar to a pilau,  paella or risotto, as it is mainly based but flavoured with spices and containing some form of meat/fish and vegetables. There are lots of variations to this dish but they are usually topped with grated cheese and finished off in the oven to get the crispy top. Cheese and rice may sound a little strange at first, but then again isn’t parmesan a main ingredient in the finishing of a risotto?

So this is my mum’s recipe, not sure where she got it from though… It makes enough for 6-8 people!

You’ll need 3 pans, one large casserole dish, one medium saucepan (for the chicken) and one large saucepan (for the rice)

Ingredients:

  • 4 chicken leg quarters
  • 4-5 bay leaves
  • 10 whole cloves
  • Salt and pepper to taste
  • 250g spicy chorizo (chopped into 1cm rounds)
  • 2 medium white onions (chopped into small pieces)
  • 2 tsp Oil
  • 300g white rice (washed and ready to steam)
  • 4 whole eggs
  • 100g grated cheese ( I used extra mature coloured cheddar)


Method:

  • Put chicken legs , bay leaves , a pinch of salt and the cloves in a covered pan of boiling water and simmer for 20 minutes then turn off the heat, leaving the pan to one side so the chicken soaks up the flavours of the stock. The chicken should be left to steep for at least 2 hours so it takes in the flavours. Start preparing the next step…
  • In a large sauce pan sauté the white onions for a couple of minutes in the cooking oil then add the chopped chorizo and sauté for a few minutes. The paprika from the chorizo will colour the onions nicely and the chorizo fats will also start coming out. This is good as it will help to colour and flavour the rice.
Sauted Chorizo and White Onions

Sauted Chorizo and White Onions

  • Add the washed rice to the chorizo and onion mix and enough water so that the rice can be cooked without having to drain left over water out (using the absorption method). Add salt and stir it all up so the flavours are evenly distributed.
  • While the rice is cooking, boil the eggs in their shells. Set the cooked rice and the hard boiled eggs to one side.
  • Return to the cooked chicken. Drain off the liquid discarding the bay leaves and cloves. Shred up the chicken into bite-sized chunks.
  • Fluff up the cooked rice and chorizo and put 1/3 of it into the bottom of a large oven safe casserole dish.
  • Then add 1/3 of the cooked chicken onto of the rice. Repeat the layering of the rice then chicken until you’ve used it all up.
  • Peel the eggs and cut in half  (length ways) and push them into the top of the rice so they are sunken in.
  • Scatter the grated cheese on top of the whole pot of rice and put into the oven to bake. I baked it at 200 degrees C for 15 minutes. The aim is to crisp up the rice at the top and melt the cheese, not to heat everything up as the rice should still be quite hot.
Yummy cheese ready to be melted and crispen up

Yummy cheese ready to be melted and crispen up


This dish is a meal in itself, so serve in big bowls for lunch or as part of dinner with some other tasty morsels to pick at. I served this dish in the middle of the table with chicken pot-stickers and the braised duck with pickled cucumber and spring onion pancakes so there was a variety of things to nibble on.

As the chicken is braised over a long time it soaks up the flavours from the loves and bay leaves. The rice takes on the paprika from the chorizo too so this dish is packed with mouth-watering flavour! It seems like a bit of a complicated dish to make but it’s actually quite simple, you just need to be organised with your time! I’ve seen other versions of this recipe that uses duck as the main source of protein, will try this next time…

Macau Baked Chorizo and Chicken Rice

Cheesy, crispy hug in a bowl goodness!

Macau ‘Portuguese’ Custard Tarts (Pasteis de Nata)

There are lots of different types of custard tarts all from different countries and cultures, all with a slightly different list of ingredients and cooking method. Yesterday I was reminded of the deliciously buttery ‘Portuguese’ custard tarts I had in Macau, an island of the main land of China, which is an ex-Portuguese colony. Due to the history of the island, Macau is a fantastic place to visit to for it’s Chinese-Portuguese fusion food and exploring the what remains of the colonial town. In contrast, post-colonial Macau is also full of over-the-top 5 star hotels and is said to have a gambling industry seven times the size of Vegas!

These custard tarts are made from a buttery puff pastry and are baked until they are caramelised, almost burnt, on top. Not being able to get the Portuguese custard tarts out of my head, I set about finding a recipe and go to work on a cold and rainy Saturday afternoon…

Portuguese Custard Tarts - Pasteis de Nata

Portuguese Custard Tarts – Pasteis de Nata
Flaky puff pastry and not a soggy bottom in sight!

After quite a bit of internet searching, comparing recipes for the original Portuguese recipe and the Macau recipe, I decided to go for the one on allrecipes.com due to the rave reviews and the helpful suggestions on how to adjust the recipe. Luckily for me, most recipes I found called for using ready made puff pastry, so who am I to question this? 🙂

After researching this recipe so much I made some changes to the recipe, so this is the final list of ingredients I used:

  • 300 ml whole milk
  • 150 ml double cream
  • 1 tbs cornflour
  • 0.5 tsp vanilla paste (I don’t have vanilla pods, too expensive!)
  • 6 egg yolks
  • 100 g sugar
  • 500g pack of puff pastry

The method I used was pretty much the same so no need to tell you about that!

Mini Portuguese Custard Tarts

Mini Portuguese Custard Tarts

The recipe was for 12 cupcake sized tarts, however I had pastry and custard left over so I ended up making some mini ones too in a mini cupcake pan. Great for little kids who don’t ever finish a whole dessert for themselves…

These tarts are so delicious and buttery, however even though I halved the sugar suggested in the original recipe they were still really sweet! So next time I’ll reduce the sugar event more and maybe add even more double cream to make them extra rich!

Macau Portuguese Custard Tarts

Macau Portuguese Custard Tarts

Since making this recipe, I have come across a  which includes a pinch of salt and a little lemon juice in the custard. Definitely worth a try to balance out the flavours…

Actual Portuguese Tarts bought in Macau (January 2012)

Actual Portuguese Tarts bought in Macau (January 2012)

As you can see from the photo above, there are different versions of the tarts available. I think we bought three custard flavour, two coconut milk flavour and one ‘sharks fin’ flavour from a well known bakery. They were straight out of the oven and I burnt my mouth on them, but boy were they worth it!