Raspberry and Double Chocolate Muffins and Loaf Cake

Raspberry and Chocolate Muffin

Raspberry and Chocolate Muffin

You know it’s been a long time since you’ve made cake when work colleagues start asking for them! Around the same time last year (just after Christmas when everyone was trying to shift a few pounds!) it was the opposite, we were all sick of the sight of cakes and biscuits in the office…

So I dusted off the muffin tin and rummaged for the muffin cases to try out this Raspberry and Chocolate Muffin recipe. This recipe current has 239 positive reviews so I chose to go with this one without even bothering to look at others, why would I ignore such a highly recommended recipe?!

Raspberry and Chocolate Muffin

Raspberry and Chocolate Muffin

First thing to note is that the recipe uses ‘cups’ rather than weighing out each ingredient making it very simple to throw together. I usually have some frozen berries in the freezer for emergency baking or fruity sauce making (yes there are instances of such urgent issues in my life). I also have quite a few blocks of chocolate left over from Christmas baking. I’m not a huge fan of eating chocolate on its own so they have gone untouched in case of other dessert making adventures.

The recipe itself calls for white chocolate but I didn’t have enough so I ended up using both white and milk chocolates, hence the ‘double chocolate’ element of the muffin. As with most cake recipes, I reduced the amount of sugar from 1 cup to 2/3 cup. I figured that with all that chocolate in it, it would be sweet enough. On taste testing the muffins (I had to have 2 just to be sure) I would even go for half a cup of sugar depending on how sweet your chocolate is!

Raspberry and Chocolate Muffins and Loaf

Raspberry and Chocolate Muffins and Loaf

I was quite surprised that there is only 50g of butter and 1 egg in this recipe. Relatively low in fat compared to other muffin recipes, an excuse to eat double the amount maybe?

Due to the expanding number of people working in my office I made two batches. The first batch went into a loaf tin and the second batch in 12 muffin cases. I have to say that sticking the the muffins is much quicker. They took 20 minutes but the loaf tin took a good 45 minutes to bake. However, having a cake to cut up is always more enjoyable when with a group of friends with a round of tea and coffee… There are pros and cons to both, but pretty much any cake is always a good thing!

So you can imagine that after baking such lovely cake and muffins for my work mates, I was looking forward to seeing their reactions when they took the initial bite and tasted the tart raspberries with the sweet chocolatey nuggets of goodness. Well something terrible happened, and not for the first time! I FORGOT to take the cakes with me in the morning! Can you imagine the horror when I realised half way into my one hour commute to work? I just dreaded having to tell them all that the cakes I had made especially for them were abandoned on my coffee table 30 miles away… The worst of it was that I wasn’t even due in the office the next day so couldn’t even give them slightly stale cake. Oh well, more for me! 🙂

Their wish has been left unfulfilled…

Vegetarian Moussaka

Vegetarian Moussaka

Vegetarian Moussaka

My sister recently passed on her panini grill when she was clearing up some kitchen worktop space, so I took it to clutter up my kitchen just that little bit more! After a couple of weeks of too many grilled cheese sandwiches, it suddenly occurred to me that I could probably use it to grill other things… So the experiments began…

Firstly I sprayed the grill plate with a little oil then cracked an egg on it, it worked a treat! The grill was so hot that it fried the egg in super quick time and with hardly any oil needed. Eggs, sunny side up with lots of black pepper. Winner!

Eggs fried on a panini grill

Eggs fried on a panini grill

Moving onto the next experiment, I spied a couple of aubergines and figured that I would give them a try too. Usually grilling aubergines requires a lot of oil. But with my handy spray bottle of cooking oil and my new multi-purpose grill, the sliced aubergine cooked in no time as it cooked from the top and bottom at the same time!

Grilled Aubergine on a panini grill

Grilled Aubergine on a Panini Grill

So whilst the aubergines were happily grilling away I cooked up the rest of the mousakka dish. As I am looking at reducing my animal protein intake I bought a bag of Quorn ‘Mince’. I’ve used Quorn products before when I was a vegetarian and don’t think it tastes too bad, especially when cooked with lots of strong flavours. I guess it’s a ‘flavour carrier’ like tofu/bean-curd!

The ‘mince’ was cooked up with chopped onions, tomatoes, courgette, peppers, mixed herbs and lots of garlic. I added some extra tomato paste and let it simmer for 10 minutes.

Grilled Aubergine with Quorn Mince

Grilled Aubergine with Quorn Mince

To make the moussaka I layered up the filling and grilled aubergines alternately then topped the whole dish with a bechamel sauce and plenty of grated cheddar and black pepper.

Vegetarian Mousakka

Vegetarian Moussaka- cheesy cheesy goodness!

After inspiring such a lovely dish, the panini grill has earned it’s permanent place in the kitchen, next to the bread maker and food mixer. Now where do I move the kettle to?… 😉

Vegetarian Moussaka

Vegetarian Moussaka- melted cheesy goodness!

Coriander Paneer and Jeera Rice

Coriander Paneer and Jeera Rice

Coriander Paneer and Jeera Rice

This isn’t the first time I’ve made Dimple’s recipe for Coriander Paneer Curry but this time I’m trying it out with a SJ’s Jeera Rice.

Coriander Paneer

Coriander Paneer

The base sauce for this curry is so simple! All ingredients are blitzed in the blender and cooked through then the paneer then left to simmer and soak up the lovely spices. I added a little yoghurt as I was a little heavy handed with the chilli!

Cumin Rice

Cumin Rice

I  made this rice using the ‘absorption method’ as this is the way I learnt to cook rice. It results in the rice being a little more sticky but that’s the way I like it. The mild fragrance from the spices gives the rice a gorgeous flavour, enough to make you want to eat the rice just on it’s own! It’s my first time cooking rice in this way but I’ll definitely be doing it again!

Coriander Paneer with Jeera Rice

Coriander Paneer with Jeera Rice

I love learning how to cook from people who cook for their families. Home cooking tastes amazing, I think its the love that goes into it. The best thing about the world of blogging is learning how people cook traditional home made dishes so I know how to recreate them too! None of the ‘westernised’ and mass produced curries found in high street restaurants for me!

Thanks to my fellow bloggers for their inspiration and lessons learned, special thanks to Dimple from Shivaay Delights and SJ from Cooking with SJ too! My life (and that of my partner’s) is infinitely better for knowing you! 🙂

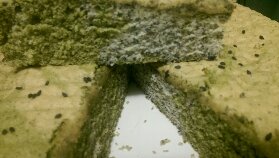
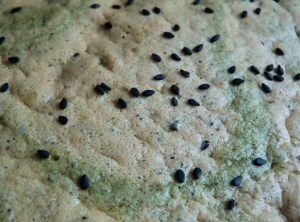
Green Tea and Black Sesame Marble Cake

Green Tea and Black Sesame Marble Cake

Green Tea and Black Sesame Marble Cake

image

Green Tea and Black Sesame Marble Cake

Green Tea and Black Sesame Marble Cake

Green Tea and Black Sesame Marble Cake

After gaining a little more confidence in my ‘cake marbling’ skills, I decided to attempt a ‘Chinese’ version for my family using the classic combination of Green Tea and Black Sesame! I have previously posted ‘Green Tea and Black Sesame Swiss Roll‘.

Using a ‘Victoria Sponge’ recipe that my mum passed onto me, I have tried to create a lighter version of the traditional ‘marble pound cake’ by using a ‘chiffon cake’ style method. This basically involves getting as much air in the eggs as possible and then folding in a small amount of flour to hold it all together. There is also less sugar which is typical of Chinese cakes.

Green Tea and Black Sesame Marble Cake

Green Tea and Black Sesame Marble Cake


Ingredients

  • 5 Medium Eggs
  • 120 g Caster Sugar
  • 90 g Self Raising Flour
  • 30 g Cornflour
  • 35 g Olive Oil
  • 2 tbs Ground Black Sesame Seeds
  • 1 tbs Matcha Powder (Food grade Green Tea Powder)
  • a pinch of black sesame seeds for decoration


Method

  • Beat the eggs and sugar together until pale and to ‘ribbon texture’
  • Sift in both flours and fold into the egg mixture (avoid mixing as it deflates all your hard work in getting the air in!)
  • Pour in the oil and stir until just combined
  • Pour half the batter into another mixing bowl
  • Fold in the ground sesame seeds into one half the batter and the matcha powder into the other half of the batter
  • Now carefully pour both batters into a lined and greased cake tin. This is difficult with this cake batter as it is very runny! The way I did it was to pour the batters into the corners and let them run into the middle so you get a chance to at least get 4 definite colour blocks.
  • Finally swirl a skewer or knife through the mixture a couple of times to create the ‘marble’ effect.


Matcha and Black Sesame Marble Cake

Matcha and Black Sesame Marble Cake

This cake was a hit with my family, not too sweet and very light in texture. A definite keeper!

Chocolate and Vanilla Marble Cake

Marble Cake

Marble Cake

On my recent adventure to the Clandestine Cake Club I came across two ladies who made ‘marble cakes’ and I found myself wondering why I have never attempted to make one? I had made a fairly low maintenance Pistachio, Cardamom and Yoghurt Cake which is a fairly straight forward all in one method with a lime syrup to drizzle on top. I had a chat with a fellow baker who had made a delicious Chocolate and Orange Marble Cake and she reassured me that the secret to marbling is that ‘less is more’. So today I decided to give it a shot!

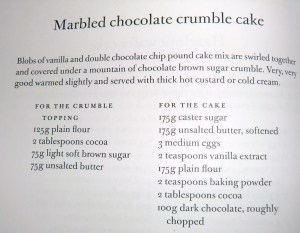
Marble Cake recipe

Marble Cake recipe from Dan Lepard’s ‘Short and Sweet’

I used a Dan Lepard recipe from his book ‘Short and Sweet’. The recipe is actually for a Marbled Chocolate Crumble Cake but I decided to skip on the crumble since to simplify things for myself. He has posted a similar recipe on his Guardian column which gives brilliant step by step photos to guide you along the way to a perfect marble cake!

Marble Loaf Cake

Marble Loaf Cake

So taking the cake out of the oven, I felt quietly confident that cake would be a success as the top was nicely marbled and you could see the contrasting colours. However one the cake had cooled though to cut through it was a very different story inside! I was obviously not thorough enough with the ‘swirling’ so have ended up with blocks of cake that are either ‘chocolate’ or ‘vanilla’. This may have something to do with my cutting the cake into squares instead of slices though…

Marbled Cake

Marbled Cake

The texture of the cake is a little crumbly on the chocolate bits where it started to fall away a little when I cut it. The vanilla parts were fine though. On tasting a few of the crumbs, I have to say it tastes lovely! Very deep chocolate flavour and not too sweet. I like Dan Lepard’s recipes and will definitely try more from his book!

Mac’n’Cheese with Chicken and Garden Peas

Mac'N'Cheese with Chicken and Peas

Mac’N’Cheese with Chicken and Peas

It’s been a lazy Sunday afternoon of watching TV cooking programmes, which developed into a craving for Mac’N’Cheese! 

There was left over roast chicken in the fridge so I decided to use it up to add some protein to the meal. I also didn’t have any ‘macaroni’ so used good old penne instead! This wasn’t a traditional Mac’N’Cheese recipe, but definitely hit the spot…

Mac'N'Cheese with Chicken and Peas

Mac’N’Cheese with Chicken and Peas

Ingredients

  • 500g penne pasta (or Macaroni if you want to be traditional!)
  • 1 tbs oil
  • 1 white onion (roughly chopped)
  • 2 tbs butter
  • 3 tbs plain flour
  • 500 ml milk
  • 150g mature cheddar cheese
  • half a wheel of Camembert cheese
  • left over roast chicken (about 3 thighs roughly chopped)
  • 2 hand-fulls of frozen peas
  • 2 slices of wholemeal bread (blitzed into breadcrumbs)
  • salt and pepper to taste

Method

  • Boil pasta until al-dente
  • While pasta is cooking, sauté onion in the oil in casserole dish that can be put into the oven
  • When onions are softened, add butter, salt and pepper
  • Once the butter has melted stir in the flour and cook out for a couple of minutes
  • Add milk and simmer until slightly thickened
  • Add cheddar cheese and stir until melted
  • Add the chicken and cooked, drained pasta and peas. Mix it all up so everything is evenly distributed
  • Rip up the Camembert and dot it all over the top of the pasta
  • Spread the breadcrumbs on top and bake in the oven for 10-15 minutes or until the bread crumbs have gone crispy.
  • Serve with a side of vegetables to lighten up the meal a little. We had roasted carrots!
Mac'N'Cheese with Roasted Carrots

Mac’N’Cheese with Roasted Carrots

This calorie laden meal has been extremely satisfying but not something that will feature in the weekly meal plan as it is incredibly rich! I liked the blend of Cheddar and Camembert cheeses as they were very distinct from each other. The peas in the dish helped to lighten the meal a little and the roasted carrots brought some colour and additional texture that was lacking. I have to say that the breadcrumb topping wasn’t as crunchy as I would have liked so maybe would skip it altogether next time!

All in all, it took 30 minutes to cook. For the carrots, I basically washed them and cut into big batons then threw them in a roasting tin with a few smashed garlic cloves and some oil. They were roasting in the oven while I cooked the pasta so everything was ready at the same time. There is loads left over for lunch/dinner tomorrow too so maybe next time I’ll use less pasta!

Spanish Style Chicken: A Quick One Pot Mid-Week Meal

Spanish Style Chicken with Sour Cream

Spanish Style Chicken with Sour Cream

This is the second time in a week I have eaten this meal. The first time was when I went to a friend’s house for dinner. I like it so much that I asked for the recipe and planned to make it again for a mid-week meal.

I have a group of friends that I have known since I was 11 years old. We all went our separate ways for university and have come back together again in adult life as everyone has begun to settle down and start families etc. Since life is so busy we try and meet at least once a month by taking it in turns to cook a 3 course meal and having the girls over for dinner. We’ve been doing it for a while now and it’s working out really well!

So this month we had a lovely Tomato and Red Pepper Soup, Spanish Style Chicken and Chocolate Fudge Cake with Vanilla Ice-cream. How lucky am I? 🙂

So this recipe is from one of the Hairy Biker’s diet cookbooks. I love the Hairy Bikers! I think they are lovely, down to earth guys who love to eat, and share their love of food with everyone. They are great at making recipes that don’t require lots of fancy ingredients and hence do not cost a lot to put together!

To make it an easy one-pot meal I pre-prepared the potatoes by first part cooking them in the micro-wave the night before. You only need to quarter the potatoes and microwave them for 5 minutes then leave to cool! This is my version of the recipe (because I just did it from memory rather than looking up the actual recipe first!).

Baked Spanish Style Chicken

Baked Spanish Style Chicken

Ingredients

  • 6 red skin potatoes (quartered and part cooked in the microwave- see above)
  • 1 medium red onion (chopped into largish pieces)
  • 1 red pepper (chopped into largish pieces)
  • 1 courgette (chopped into largish pieces)
  • 2 handfuls of Chestnut mushrooms (halved)
  • 2 fresh tomatoes (quartered)
  • Chorizo (I used about 8 thin slices as that is all I had- best to get a whole sausage and chop up)
  • 6 chicken thighs (skin on and with bone)
  • 2 tsp paprika
  • 2 tsp dried herbs
  • 2 tsp olive oil
  • 2 tbs tomato purée
  • salt and pepper to taste
  • sour cream- to serve

Method

  • In a large casserole/baking dish. Put in everything and toss it all together to evenly coat all the vegetables with the tomato purée and olive oil.
  • Lay the chicken pieces on top (skin side up)
  • Bake at 200 degrees C for about 45-50 minutes or until the chicken is cooked through. Check on it half way through as you may need to turn the vegetables a little. I kept the potatoes near the top so they crispen up a little.
  • Serve in dishes with some sour cream.
Baked Spanish Style Chicken with Sour Cream

Baked Spanish Style Chicken with Sour Cream

This is a great one-pot midweek meal that is so easy to put together and the left-overs can be used up for lunch the next day. I made it a couple of days in advance so the flavours got a chance to mix together more. These days I try and prepare healthy mid-week meals in advance so they can be put straight into the oven with little fuss. And since the weather is terribly cold and miserable at the moment, having a hot and nicely spiced meal brings so much satisfaction after a long day at work! So if you have any suggestions, please feel free to share! 🙂

Mango and Coconut Pudding: A lighter dessert after a heavy Chinese New Year meal

Mango and Coconut Pudding with Fresh Mango and Blueberries

Mango and Coconut Pudding with Fresh Mango and Blueberries

Mango and Coconut Pudding with Fresh Mango and Blueberries

Mango and Coconut Pudding with Fresh Mango and Blueberries

‘Chinese’ and ‘desserts’ don’t sit too well together. Well, that’s not strictly true… What I mean is that ‘Chinese desserts’ are not the same as those from other countries and cultures. We have traditional sweets and baked goods but they aren’t usually eaten at the end of a meal, more as a snack really! At the end of a meal it is much more common to have a platter or pieces of fruit that are shared in the middle of the table or a sweet ‘soup’.

More recently Chinese cuisine has been heavily influenced by other cultures so there are a wider range of ‘fusion’ desserts out there, taking the ideas of other desserts but using more traditionally Chinese ingredients. Think ‘Lychee panna cotta‘ or ‘Green tea Chiffon Cake‘ and you are going in the right direction. (Note to self: try these recipes out!)

Mango Pudding is a family favourite in Chinese Dim Sum Restaurants. It is a light and tasty end to a meal, often served in small portions with coconut pudding and alongside a platter of freshly cut fruit.

For Chinese New Year 2014 celebrations my family had a ‘Korean Barbecue’. This does not involve going out doors in the midst of the British winter to grill chunks of meat, but is a more comfortable indoor activity with a ‘grill’ in the middle of the table and lots of fresh marinated meats/seafood/vegetables for each person to grill themselves. It’s a great way for everyone to get involved in the cooking of the meal and can take place over hours as you slowly grill your food and chat the night away! Very similar to a Swiss ‘raclette‘, just without the cheese!

Korean Barbecue

Korean Barbecue

Korean Barbecue

Korean Barbecue

As you can imagine a lighter dessert to such a rich meal would be a perfect end to the celebrations, so I taking inspiration from a single mango in the fruit bowl I decided to go for Mango pudding! This dessert is more like a jelly than a traditional ‘pudding’. It can be found all over South East Asia and apparently originates from India!

Mango and Coconut Pudding with Fresh Mango and Blueberries

Mango and Coconut Pudding with Fresh Mango and Blueberries

Looking around online for a recipe, I started off with Christine Ho’s Mango Pudding recipe I remembered that my mum had bought me a few packets of mango jelly on a recent trip to Hong Kong. I had no idea what to do with them, so this recipe was perfect! I found Thai version of the recipe that uses coconut milk in place of evaporated milk so decided to combine the two recipes. (Mainly because I had no evaporated milk, but always have coconut milk in the cupboard!)

Mango and Coconut Pudding

Ingredients

  • 2x 80g packets of mango jelly (jello)
  • 200 ml hot water
  • 100 ml cold water
  • 1x 400g tin of coconut milk
  • 500ml of mango purée (tinned)
  • 1 ripe mango
  • Blueberries to decorate (choose any fruit/berries you like!)

Method

  • Dissolve the jelly crystals in the hot water and stir
  • Add the cold water to the jelly mixture
  • Add the tin of coconut milk and mango purée to dissolved jelly and whisk to evenly distribute
  • Pour into jelly moulds/serving bowls/glasses
  • Put a few chopped pieces of mango into each mould/bowl/glass so that you get a nice piece of fresh mango in each mouth-full
  • Chill in the fridge until set (about 2 hours)
  • Decorate the top of each mango pudding with the extra blueberries and mango pieces (or whatever fruit you decided on). Alternatively turn out pudding from the mould and decorate once on the serving plate. Sometimes it is served with extra cream of condensed milk.
Mango and Coconut Pudding with Fresh Mango and Blueberries

Mango and Coconut Pudding with Fresh Mango and Blueberries- Individual mini puddings

As usual I have adapted the recipe used so I can use what I’ve got in the cupboards already. The consistency of the pudding was perfect, just set and not too stiff. Like a silky panna cotta…

However I think that using coconut milk instead of evaporated milk has really enhanced the flavour. Simple yet delicious!

To make a vegetarian and no-preservative version of this recipe, use agar agar and puree fresh mangos. There is no need to add extra sugar if you have really sweet and ripe mangos!

Mango and Coconut Pudding with Fresh Mango and Blueberries

Mango and Coconut Pudding with Fresh Mango and Blueberries- Individual pots