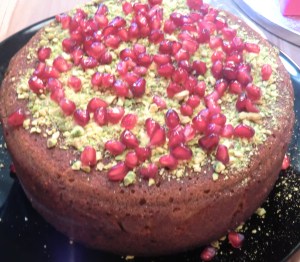
Black Sesame and Pear Cake

Black Sesame and Pear Cake: Clandestine Cake Club meet No.3

Black Sesame and Pear Cake

Black Sesame and Pear Cake

This cake club comes around so quickly! But I love it! 😀

My ultimate pastime activity; baking, eating and talking about cake! If this is your first time hearing about the Clandestine Cake Club, you must visit their website and sign up to a local club immediately… This was my third meeting with previous bakes being the Spanish Orange and Almond Cake and the Pistachio, Cardamom and Yoghurt Cake.

Clandestine Cake Club Spread

Clandestine Cake Club Spread

The theme of this club meeting was ‘Think Outside the Box’ due to the lovely people of Selfpackaging.com sponsoring the event. When thinking about the type of cake to take along, I was really stuck with the theme. I’m not a fan of making cakes that taste strange and I’m good with sugar paste either… So I decided to go with my favourite or favourite ingredients: Black Sesame! 😀

Black Sesame isn’t widely used in cooking, unless you are Asian! So I thought that it would be a new flavour for most people. (Any excuse to use black sesame! :))

Black Sesame and Pear Loaf Cake

Black Sesame and Pear Loaf Cake

Luckily for me I came across a recipe for Black Sesame and Pear Cake which makes use of pears in a traditionally western way of baking, so it was a good way of introducing the flavour without being too ‘out there’!

What I learnt from this recipe was that it rises quite a bit (mine bubbled right over the sides of the tin all over the oven) and it is very dense so needs a long bake in a lower temperature. I also had to cover the cake part way through cooking with foil as it was browning very quickly.

Black Sesame and Pear Loaf

Black Sesame and Pear Loaf

Due to the long baking time, the edges became quite crisp so I snapped them off. The texture of the crisp sugary top and the moist cake was quite nice.

Pear and Black Sesame Cake

Pear and Black Sesame Cake

This cake went down quite well at the cake club meeting. Several people asked me where they could buy black sesame seeds from. (A good sign that!) There was also very little left at the end of the evening (Good sign number 2!)

It may not be pretty, but it tasted good! I think my forte is for flavour rather than looks in baking… 😀

I also wanted to share with you a couple of highlights of mine from the evening…

Pistachio, Polenta and Elderflower Cake

Pistachio, Polenta and Elderflower Cake (Looks gorgeous doesn’t it?!)

I may be a little biased as this cake was made by my cousin, but how beautiful is this?

Bento Box Cake

Pandan Cake with Lychee Butter cream

This cake was a work of art as well as being delicious! What amazed me was that the baker (Steven) had just bought some flavours that he’s never used before from a Chinese supermarket and baked a cake with it. He also made these adorable pandas out by making marshmallow from scratch! What a legend!


Tofu Stir Fry with Chicken and Chorizo rice

Chorizo and Chicken Rice with Tofu and Vegetable Stir Fry

Tofu Stir Fry with Chicken and Chorizo Rice

Tofu Stir Fry with Chicken and Chorizo Rice

I have previously posted a recipe for Macau Portuguese Baked Rice. This time I have used the same flavour combinations but simplified the recipe for a quicker meal that takes less than 30 minutes to put together and serve for a mid week dinner. Refer to the previous recipe, but skip the cheese and boiled eggs so the rice is only steamed on the stove. I poached some chicken with cloves, bay leaves and garlic then left it in the fridge, for when I was cooking this dish. However any left over roast chicken will work too.

Chorizo and Chicken Rice

Chorizo and Chicken Rice

To go with the rice, I quickly stir-fried some ready cooked fried tofu with some chopped leeks, mange tout, celery and mushrooms. These are basically the vegetables I had in the fridge/freezer so any you have to use up could work too.

Tofu Stir Fry

Tofu Stir Fry

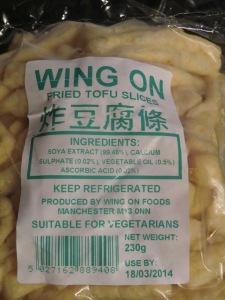
Fried tofu is a great vegetarian staple to have in the fridge for a quick and nutritious meal. They can be bought in bags in Asian supermarkets (look in the fridges) or you can deep fry your own tofu.

Fried Tofu Sticks

Fried Tofu Sticks

To add flavour to the tofu and vegetables, I used a couple of table spoons of vegetarian stir-fry sauce (an alternative to oyster sauce), light and dark soy sauce, and sesame oil. The tofu soaks up all the flavours like a sponge, so you can add what ever you like to the sauce. I added a few splashes of water too as the dish was a little too dry. Remember not to over cook the vegetables as you’re looking for the crunchy texture to contrast the soft tofu!

Tofu Stir Fry with Chicken and Chorizo rice

Tofu Stir Fry with Chicken and Chorizo rice

This tofu dish can be served with plain rice or egg fried rice for a filling vegetarian meal.

If you are avoiding gluten, double check the label of the chorizo and cooking sauces for gluten. Gluten free versions can usually be found!

GF and Vegan: Sweet Potato Vermicelli with Vegetables in Blackbean Sauce

Sweet Potato Noodles with Vegetables in Blackbean Sauce

Sweet Potato Noodles with Vegetables in Black Bean Sauce

Have you ever heard of Sweet Potato Vermicelli?! Well I’ve had this packet of dried noodles in my cupboard for about 2 years and had forgotten all about it until today. I’m not even sure why I bought it in the first place! Maybe because it is something I hadn’t tried before?  When the noodles are dry they are grey but once cooked they become clear. There are only two ingredients to these noodles; sweet potato flour and water!

Sweet Potato Vermicelli

Sweet Potato Vermicelli

After over-indulging in pancakes for Shrove Tuesday, tonight’s dinner really needed to be healthy and nutritious! So I dug out all the vegetables from the fridge and decided to make a stir fry in black bean sauce. Fermented black beans can be found in Chinese supermarkets in bottles. Ideally you would use the dried black beans rather than the bottles of ready made black bean sauce, however if you want to make this recipe super quick and easy then feel free to use bottled sauces. 

Unfortunately the packet of noodles didn’t have any cooking instructions so I decided to guess it. In hindsight, I should have just looked it up online as there are plenty of websites offering advice! Lessons learned and all that… 🙂

Sauce ingredients

Sauce ingredients

Ingredients

  • 1 packet of Sweet Potato Vermicelli
  • 3tbs fermented blackbeans
  • 4 cloves of garlic (chopped)
  • 1 tsp sea salt
  • 0.5 tsp sugar
  • 1 tbs light soy sauce
  • 1 tbs dark soy sauce
  • 1 tbs sesame oil
  • 1 tbs vegetable oil
  • 1 tbs corn flour
  • Water
  • Stir frying vegetables (I used broccoli, courgettes, carrots and leeks)
  • Coriander (I had a bunch of stalks left over so used them)
Black Bean Sauce

Black Bean Sauce

Method

  • Boil the noodles for 5 minutes (you should then ‘shock’ them in cold water and then coat in sesame oil so they don’t get too sticky)
  • Blanch vegetables that need to be pre-cooked and set aside (I threw them in with the noodles)
  • Mix the black beans, garlic, sugar, salt, soy sauces, salt and sesame oil together in a bowl
  • Heat up the vegetable oil and and stir fry the leeks and courgettes
  • Add pre mixed black bean sauce ingredients to the pan and stir fry for a couple of minutes
  • Add water to create the gravy, thickening with the cornflour (to avoid lumps mix the cornflour with water to create a paste before adding)
  • Add the part cooked vegetables and coriander into the sauce and stir around then add the noodles, tossing it all together so all noodles are coated with the sauce
Sweet Potato Noodles in Black Bean Sauce

Sweet Potato Noodles in Black Bean Sauce

This recipe makes enough for 6 people and is super filling! The Sweet Potato noodles really soak up a lot of the sauce, so the dish ends up quite dry but tasty. I think I over cooked the noodles as they were quite sticky! This may also be because I didn’t ‘shock’ them with cold water to stop the cooking process.

Overall I’d say that the sweet potato vermicelli is a tasty a alternative for people who are looking for an alternative to wheat noodles! And since it is a stir fry, very quick to cook for a mid-week meal…

I’ve also just realised that my soy sauces aren’t gluten free! So please buy GF versions if needed! 🙂

Chinese Five Spiced Roast Belly Pork

Happy New Year!

Since this is my first post of 2014, please forgive me for the lateness of my well-wishes! I hope every had a lovely Christmas and New Year break? For myself, it was full of eating and sleeping! Perfect! I didn’t do much cooking so not much to share, however I did invite some friends and family over for dinner on New Year’s Day and tried my mum’s recipe for roast belly pork for the first time ever!

For those of you who have previously read my blog, you’ll know that I’m not a red meat eater. Those of you who are new to me now know too! So I very very very rarely cook pork, beef, lamb, veal etc. I’ll sometimes eat it, but not out of preference, sometimes out of curiosity. My aversion to red meat isn’t for any religious or dietary reason, just that I don’t particularly like the taste of it so have now developed some kind of psychological dislike of it! However I also used to hate olives, picking them out of my salads and pizza but now I can tolerate them. So maybe my tastes will change as I continue to age…

New Years Day Dinner

So New Year’s Day dinner was a fairly easy going affair. There were 5 adults and 3 children so I made the Wintery Chinese Chicken, Chestnut and Shitake Mushroom Stew earlier on in the day then reheated it just before serving to save on time and last minute stress. The belly pork was prepared the day before and left to marinade in the fridge ready to throw into the oven. Only the Fish (steamed Seabream), Choy Sum (Greens) and Scrambled Tomato Eggs needed to be cooked at the last minute. All were served with bowls of steamed jasmine rice.

Considering that I’ve never cooked pork belly before, I was pretty worried that the crackling wouldn’t be crunchy and would end up chewy. I go the recipe from my mum who makes very delicious roast pork belly (it’s coveted by all my family) and has gotten the recipe perfected. So she imparted her expert knowledge to me, as well as the massive piece of pork that she ‘just happened’ to have in the freezer! How many people would store massive joints of meat ‘just in case’?! Then again, that’s the reason you will never go hungry if you visit my mum’s house, whereas a visit to me needs to announce far in advance so I can go food shopping… 🙂

This belly pork was so huge that it only just fit into the baking tray that is pretty much the width of the oven!

So here is the ‘recipe’ as memorised by my mum so I have no idea where the original recipe is from:

White wine and five spice rub

White wine and five spice rub

1) Get the piece of pork belly and put it skin side down onto a heavy bottom baking tray. Pour over a few tablespoons of white white and rub it into the pork meat. Then sprinkle over a few tablespoons of five spice powder and rub it in.

Coarse Sea Salt Rub

Coarse Sea Salt Rub

2) Turn it over and spread the whole thing with coarse sea salt. That worked out to be half a tub for me! It needs to be completed covered! (I think it helps to dry out the skin to ensure a crispy finish)

Cover loosely with foil and leave on the fridge over night to marinade and soak up all the flavours…

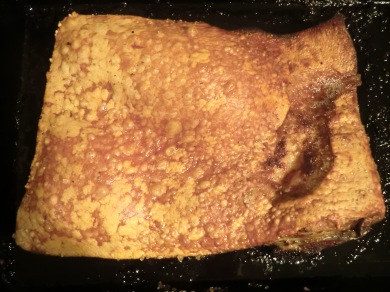
Crispy Crackling!

Crispy Crackling!

3) When you are ready to roast it, crank up the oven to the highest it goes (mine is 250 degrees C). Knock all the sea salt off the meat then stick the tray of meat into the hot oven on a high shelf, roasting the skin until it starts to ‘puff up’ (for me about 15- 20 minutes). Then turn down the heat to 200 degrees C and roast for another 10-15 minutes or until it is cooked through.

Five Spiced Roast Belly Pork

Five Spiced Roast Belly Pork

I’m pretty happy with my first attempt at roast belly pork, I got lots of compliments and the crunching I heard around the table kept my fears at bay. I didn’t actually taste it myself, maybe next time! As we only managed to get through a third of the massive portion of meat, I chopped and wrapped up the left overs for the guests to take home. A novel New Years Day gift I think! 😉

Pot-stickers, Gyoza, Mantu, Dumplings: The bite sized delights that cross cultures

Prawn Dumplings/Pot Stickers

Postickers

During my childhood, my parents were keen to ensure my siblings and I retained our culture, mother tongue and heritage. As second generation migrants living in the UK there was always a need to balance my two identities; though not without the occasional volcanic eruption!

I attended a Sunday supplementary school to learn to read and write Chinese. This took place from 1-3pm each week and was attended by hundreds of children just like me, my sister and my cousins. A regular ritual for my family was to go to China Town and at 12pm for a dim sum lunch before we then rushed over to school. In Hong Kong, dim sum is traditionally served throughout the day.From early in the morning for breakfast right through to late afternoon for late lunches. ‘Dim Sum’ (點心) translated means ‘Touch of the Heart’.  If you’ve read my ‘About’ page, you’ll know that my name is Sam (心) so you’ll see that I have a natural affinity to this delicious cuisine!

Postickers

Prawn Potstickers

Dim Sum is sometimes described as ‘Chinese Tapas’. You get lots of small dishes served in the middle of the table for all to share. The great things about Dim Sum is that the more people you have around the table, the more variety you can order. It’s a great way to have a lazy lunch with your friends, ordering as you go, washed down with plenty of jasmine tea.

Pot-sticker, Gyoza, Mantu, Dumplings etc. come in many guises. It’s an amazing food that many cultures and countries have their own versions of. Basically a disk of dough stuffed with some form of meat or vegetable filling, then folded and sealed. They can be steamed, boiled, pan-fried or deep fried. The possibilities are endless!

I regularly use shop bought dumpling pastry when I’m making them at home. They are fairly cheap and very convenient! In the early days of our relationship my partner wanted to show off the dishes from his home country (Afghanistan) and taught me how to make ‘Mantu’ and ‘Aushak’. Aushak are basically a dumpling filled with cooked leeks/scallions/spring onions, and boiled or steamed. Mantu are a meat version made with ground or minced lamb/beef. They are then served with a meaty or lentil based sauce. It seems that these Afghan dumplings were brought to the country by Mongolian horsemen when they were invading the country. Afghans have adapted the dumplings and added spices and stronger flavours to suit the Central Asian palate. A very different way of serving dumplings to the basic Chinese pot-stickers that are served plain with a light dipping sauce.

Afghan Mantu

Afghan Mantu

Dumpling making is time consuming but worth the effort. So today I have made a big batch. I’ve decided to try and make my own dumpling dough and turned to Christine again for her wise advice: Home made dumpling wrappers.

From one lot of dumpling dough I made three varieties: Prawn and shitake mushroom pot-stickers, Aushak, and Banana gyoza. This was mainly to test out the dough to see what kind of cooking methods it will stand up to.

The pot-stickers were fantastic! For the filling, I processed raw prawns/shrimp with rehydrated shitake mushrooms and added sesame oil, salt and pepper to taste. I also added some cornflour to help soak up some of the juice during the cooking process.

For the Aushak I made the filling, wrapped them, then stuck them in the freezer on a baking sheet for another time.

The banana gyoza were stuffed with mashed banana then deep fried. The pastry didn’t like the wet banana much as a couple of them burst during cooking. However, served with a coconut caramel recipe that I found, they were to die for! For one gyoza I also added a spoonful of Nutella (yum!) but found the overall taste to be too sweet and sickly. I think next time I’m going to add a little sea salt to the caramel to balance out the flavours a little.

Banana Gyoza

Banana Gyoza

East meets west: stem ginger and pistachio chocolate brownies


Stem Ginger and Chocolate Brownie with Stem Ginger Ice cream

Stem Ginger and Chocolate Brownie with Stem Ginger Ice cream

Ginger is synonymous with Chinese food and is added at the end of cooking to add freshness, or at the beginning of a slow cooked casserole to add subtle spicy undertones to the dish.

I love the taste of sweetened ginger and have been thinking about how to incorporate stem ginger into a dessert that is traditionally western in style. Obviously there is the classic British dessert, steamed ginger pudding with lashings of vanilla custard and good old gingerbread men! But I wanted something richer and, ideally, involving chocolate!

I found this recipe: http://ginandcrumpets.com/brownies-with-stem-ginger/

As I was planning on serving this as the dessert for dinner with friends, I wanted it to look a more pleasing to the eye. So thought about colour and texture. As well as loving ginger, I also love any kind of nuts, so pistachio nuts would be the perfect addition!

Then to cut through the richness of the dark chocolate, I made a pistachio ice cream based on this recipe: http://www.bbcgoodfood.com/recipes/741636/nochurn-ice-cream

The brownie has a nice ginger taste, but next time I think I’ll add even more to bring out the flavour. And maybe a ginger ice cream to go with it!

“Crispy chicken skin is the new bacon”

CIMG3045

There seems to be a new trend in the UK at the moment for ‘American diner’ style restaurants that make fancy cocktails to go with your over-priced burger. About 6 months ago I decided to try one of these restaurants after seeing rave reviews. I was most looking forward to their ‘Rooster Scratchings’!

As a Chinese person, I’m ashamed to say that I don’t eat red meat. That rules out about 50 percent of delicious Chinese cuisine and causes no end of headaches for my family and friends who invite me for meals. It’s not for any particular reason really. My mum tells me that I never used to eat much red meat when I was growing up, so I must have just developed a general disliking to it and now it is firmly embedded into my subconscious self.  I always say that I’m not a picky eater, but that’s not true really. My stomach turns at the thought of bacon and at the slight whiff of lamb, I’ll be heading off in the opposite direction!

Hence I miss out on the culinary delights of roast belly pork with the extra crunchy crackling and slow roasted ribs where the meat just falls off the bone… So as you can imagine, finding an alternative like ‘Rooster Scratchings’ caused me no end of excitement! However, I must have built up my expectations a little too much, as I found them quite greasy and salty. What a disappointment…

Fast forward half a year and whilst preparing a boring mid-week meal of roasted chicken thighs (with lots of spices to please my partner who insists that my cooking is somewhat ‘tasteless’). I was ripping off the chicken skins and it suddenly occurred to me that I could probably do something with them too… After all in this time of austerity, its a shame to waste anything!

A quick internet search later, I’ve found this: http://homecookinginmontana.blogspot.co.uk/2013/07/oven-fried-crispy-chicken-skin.html

As usual, I don’t really stick to recipes so to give extra flavour I’ve added mixed spices.  So the key to ensuring you get it really crispy and none greasy is to bake rather than fry. I reduced the cooking time down to about 25-30 minutes and didnt’ bother to sandwich the skins between two pans, they look nicer all bubbly! It’s a great addition and doesn’t take any extra time if you are making your dinner in the oven anyway. Imagine them crumbled over a lovely salad for extra crunch…

This is what it should look like

©homecookinginmontana.blogspot.co.uk

crispy chicken skin

The simple pineapple bun

Hong Kong Pineapple Buns

Hong Kong Pineapple Buns

During my childhood, my parents bought baked Chinese goods from ‘Ho’s bakery’ in Manchester’s China Town. Ho’s is a long standing institution that has brought Hong Kong bakery to the Chinese migrants who wanted a little taste of what they were missing from home.

‘Chinese’ and ‘English’ oven baked breads are very different. Chinese bread is usually very light and soft in texture, usually on the sweet side and often enveloping finely chopped cooked meat or delicate sweet fillings. Kind of like a ready made sandwich. English breads need to be sturdier so they can be sliced to hold a decent amount of filling or torn to be dipped into a hearty soup without it disintegrating.

Chinese buns are usually eaten warm for breakfast. In Hong Kong, small bakeries can be found everywhere offering quick and tasty breakfasts for people rushing to work in the non-stop crowded city. In England this Chinese bread was a tasty Sunday treat that my dad would pick up on his way home from replenishing stock for the restaurant after a busy Saturday of trading.

Hong Kong Pineapple Buns

Hong Kong Pineapple Buns

I tried baking bread for the first time at the age of 24, in a small village called Ololosokwan in Northern Tanzania. I was on my ‘gap year’ trying, and failing, to save the world with no access to fresh produce for weeks at a time. Luckily I wasn’t alone! In the next house was an Irish man who was working at the local school and had asked his son to email him a basic bread recipe. Before this it had never occurred to me to do anything apart from grab a loaf of bread off the supermarket shelf. We didn’t have that luxury in Ololosokwan! The bread wasn’t amazing as we didn’t actually have the right flour, but it was was bread none the less. And more importantly, it was a reminder of home!

I didn’t try and make bread again for a few years and when I did I always got tired of the whole kneading process so my ‘bread’ was usually disappointing. I have had some successes, but mostly very dense and unappetising results. One day I looked up how to make Chinese style bread and found a recipe online. It was truly inspired and the results have been amazing!

Pineapple buns

Pineapple buns

For my first blog, I am recreating a delicious typical Chinese delight called a ‘pineapple bun’ or ‘菠蘿包’ in Cantonese. They contain no pineapple, but end up looking a little like the outside of one and have a similar texture to brioche. They are divine!  I’ve made these buns by hand before but it is very time consuming and messy as the dough is very wet and difficult to work with, hence the reason I don’t make them very often! This time I have used a bread maker to do the hard work for me.

This recipe shows you how to make the basic Chinese white bread that it used for most recipes, and as you can see it doesn’t only use the traditional ‘fast action’ yeast that is usually found in western bread recipes. The Tangzhong Method, or ‘湯種’, is the secret to the pillowy soft buns sold in bakeries such as Ho’s to this day! Thank you Christine, you are amazing! http://en.christinesrecipes.com/2010/03/japanese-style-bacon-and-cheese-bread.html

For the crunchy topping: http://www.pigpigscorner.com/2011/01/pineapple-bun-bo-luo-bao-by-christines.html

If you’ve never had one, please try it! It’s perfect with a cup of strong English tea!

Hong Kong Pineapple Buns

Hong Kong Pineapple Buns