Nepalese Dal Bhat: A Cracking Good Food Session

Nepalese Dal Bhat

The shocking news of the devastation caused by the earthquake on 25th April 2015 in Nepal that has seen the lives of 2000 people lost is beyond my comprehension. Just reading the stories and seeing the images on line is shocking enough, and my heart goes out to those affected. If you are able to contribute any financial support, please donate to your local Red Cross society who have set up an emergency appeal to support survivors and their families.

Nepal Earthquake Appeal

Nepal Earthquake Appeal

It is at times like these that I am reminded of my good fortune in life. To be able to live in a stable country better equiped to deal with devastating natural disasters. Although I am in Myanmar, far away from the country of Nepal, I have received numerous messages from my friends and family concerned of my welfare and worrying how I am getting on in this new country.

Dal Bhat

This post should have been written a couple of months ago, but as life got busy it got pushed further down the list of priorities. However it seems like its the right time to share these recipes now. Even though Nepal is in the midst of mass devastation there will be people who will be trying to get some normality in their lives, preparing Dal Bhat as their staple meal twice a day.

Cracking Good Food Nepalese Dal Bhat Cooking Class

Dal is an aromatic lentil soup that adds flavour to plain rice (bhat) and provides a great base for your curries. The recipes are courtesy of Momo Cooking who run fun and friendly workshop style cooking classes teaching everything you need to know about home cooked Nepalese food. As well as running their own cooking classes and catering business, they also run classes for Cracking Good Food to spread the word of great Nepalese cuisine!

Momo Cooking

Momo Cooking

Dal Bhat is the reknowned Nepali dish and a staple in the rice-cultivating regions. It generally consists of dal (lentils), baht (rice), a vegetable curry / saag, and a chutney. It is usually eaten by mixing the dal with the rice to form a soupy mixture, making a ball of the mixture with your hands, and adding curry and chutney. Hense why this post consists of three recipes! (All recipes are taken directly from Momo Cooking)

Cracking Food Good Dal Bhat cooking class

Dal

Ingredients (10 servings)

  • 200g Red lentils
  • 200g Black lentils (urid dal)
  • 2 1/2 litres water
  • 2 tsp oil
  • Fresh coriander to garnish

Spices:

  • 1 tsp turmeric
  • 2 tsp salt
  • 3 tsp coriander powder
  • 3 tsp garam masala
  • 3 tsp curry powder

Method

  • Rinse and drain your lentils until the water is clear
  • Add all of the water, spices and oil
  • Cover the pan and bring contents to boil. Once boiling, leave covered and simmer for around 90 minutes until the dal has reduced down and thickened into a creamy soup.
  • Garnish with chopped coriander and serve.

* Tip: To save time when cooking dal, make up a large batch and then divide and freeze individual portions. Take out and re-heat until bubbling as and when you need it. Make sure to taste your reheated dal before serving as it may need reseasoning.

Dal Bhat

Garlic Saag

Ingredients (6 servings)

  • 250g fresh spinach leaves
  • 4 garlic cloves, sliced
  • Generous pinch salt
  • 1/2 tbsp oil

Method

  • Heat oil in a pan and fry garlic until just starting to brown.
  • Add spinach, sprinkle with salt and stir fry until the spinach has wilted down.
  • Take off the heat and serve.

*Tip: Try replacing the spinach for seasonal greens such as kale or spring greens, and add a bit of heat by throwing in a bit of chopped fresh chilli.

Tomato Achaar

Tomato Achaar

Tomato Achaar

Served as a classic accompaniment to dal bhat, or with crispy papadums as a tasty snack in its own right Ingredients (6 servings)

Ingredients

  • 1/2 cup soya beans
  • 4 medium tomatoes
  • 1 red onion, thinly sliced
  • 2 large garlic cloves, thinly sliced
  • 1 fresh chilli, thinly sliced
  • 200 ml water
  • 1 handful fresh coriander, roughly chopped

Spices:

  • 1 tsp turmeric
  • 1/2 tsp salt
  • 1tsp meat masala
  • 1tsp coriander powder
  • 1tsp garam masala
  • 1tsp mild curry powder

*Tip: If it’s hard for you to get hold of soya beans, you can replace them with fresh garden peas instead. Skip step 1 and 2 in the method, and add the peas in step 8, in place of the cooked soya beans. Remove from the heat once the peas are cooked.

Method

  • Heat the soya beans in a dry pan for about 5 minutes.
  • Move the beans around the pan regularly to ensure that they cook evenly on every side. You will know the beans are cooked when you hear small popping sounds, see small brown dots appear on the beans and you get a nutty smell coming from the pan.
  • Take beans off the heat and set aside until later.
  • Heat 1 tbsp oil in a high sided pan, add the onions and fry until starting to brown.
  • Add turmeric and stir.
  • Add tomatoes, garlic and chilli and stir in until everything is coated with oil and turmeric.
  • Sprinkle the salt and the rest of the spices evenly across the tomatoes, add the water and stir everything through so that the spices are mixed into the curry.
  • Cover pan, bring up to a boil.
  • As tomatoes soften, use the back of a spoon to mash them together. Slowly add more water if the tomatoes seem to be drying out and catching on the pan.
  • Once all of the tomatoes have softened, add the cooked soya beans and stir through.
  • Leave on the heat for about another minute, stirring and adding splashes of water if needed.
  • Remove from the heat, garnish with fresh coriander and serve.

I’ve not included a curry recipe in this post as it’s getting far too long! Add your favouite vegetable and/or meat dishes to this for a completely satisfying meal… Enjoy! 😀

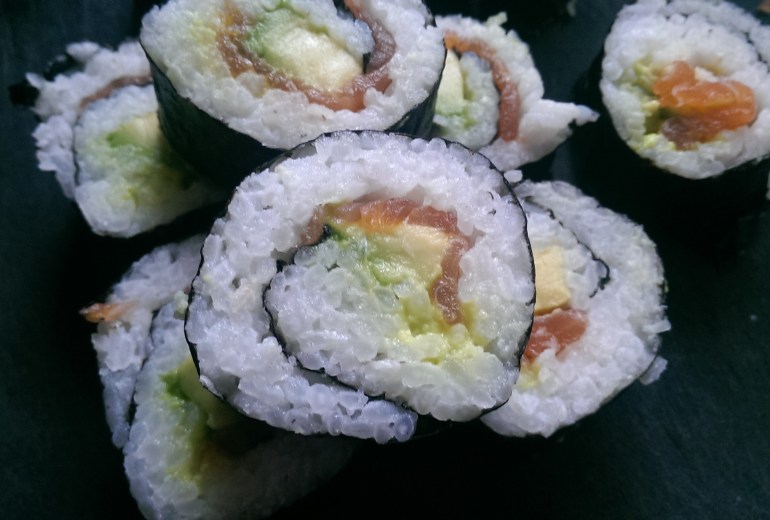
Smoked Salmon and Avocado Sushi Maki Rolls

Smoked Salmon and Avocado Sushi Maki

 Smoked Salmon and Avocado Sushi Maki Rolls

Smoked Salmon and Avocado Sushi Maki Rolls

Smoked Salmon and Avocado Sushi Maki Rolls

I really enjoy eating sushi, but good sushi in the UK is very expensive to buy. Affordable sushi is quite uninspiring so you may as well make it at home!  I’ve attempted to make sushi in the past but have always managed to ruin the rice by overcooking it. This time I tried out a new recipe and the rice came out perfectly.

  • 1 cup sushi rice
  • 2 cold cups water
  • 1 tbs sushi vinegar
  • 60g smoked salmon
  • half avocado, cut into chunky strips
  • 1 tsp wabasi
  • Nori seaweed sheets
  • Extra wasabi and sushi soy sauce to serve

Method:

  • Rinse the rice a couple of times until the water runs clear
  • Place the rice and 2 cups of cold water into a medium saucepan and place over high heat. Bring to a boil, uncovered. Once it begins to boil, reduce the heat to the lowest setting and cover. Cook for 15 minutes. Remove from the heat and let stand, covered, for 10 minutes.
  • Transfer the rice into a large mixing bowl and add the sushi vinegar and stir thoroughly to combine and coat all the rice. Allow to cool to room temperature before using to make sushi maki rolls.
  • Rolling the sushi maki rolls is quite difficult to explain in writing, so I’ve found this handy visual guide online to direct you to!  🙂
Smoked Salmon and Avocado Sushi Maki Rolls

Smoked Salmon and Avocado Sushi Maki Rolls

I used smoked salmon as sushi grade raw fish is difficult to come by in the north west of England. You can choose whatever filling you like and use as much wasabi in the rolls as you can stand. Serve with sushi soy sauce and extra wasabi.

Making your own sushi is a little fiddly and time consuming but well worth the effort. The rice should never be refrigerated as this causes it to harden immediately, so left over sushi rice should just be left in a covered bowl at room temperature.

I made this sushi make as part of an ‘Asian Inspired Afternoon Tea’ served along side ‘Braised Duck in Cucumber Cups’, ‘Thai Style Prawn Noodle Salad’ and ‘Chicken and Shitake Pot Stickers’.

'Asian Inspired' Afternoon Tea

‘Asian Inspired’ Afternoon Tea

Tofu Stir Fry with Chicken and Chorizo rice

Chorizo and Chicken Rice with Tofu and Vegetable Stir Fry

Tofu Stir Fry with Chicken and Chorizo Rice

Tofu Stir Fry with Chicken and Chorizo Rice

I have previously posted a recipe for Macau Portuguese Baked Rice. This time I have used the same flavour combinations but simplified the recipe for a quicker meal that takes less than 30 minutes to put together and serve for a mid week dinner. Refer to the previous recipe, but skip the cheese and boiled eggs so the rice is only steamed on the stove. I poached some chicken with cloves, bay leaves and garlic then left it in the fridge, for when I was cooking this dish. However any left over roast chicken will work too.

Chorizo and Chicken Rice

Chorizo and Chicken Rice

To go with the rice, I quickly stir-fried some ready cooked fried tofu with some chopped leeks, mange tout, celery and mushrooms. These are basically the vegetables I had in the fridge/freezer so any you have to use up could work too.

Tofu Stir Fry

Tofu Stir Fry

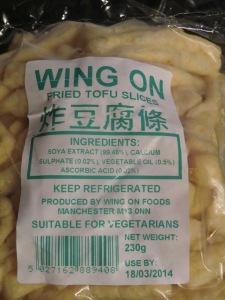
Fried tofu is a great vegetarian staple to have in the fridge for a quick and nutritious meal. They can be bought in bags in Asian supermarkets (look in the fridges) or you can deep fry your own tofu.

Fried Tofu Sticks

Fried Tofu Sticks

To add flavour to the tofu and vegetables, I used a couple of table spoons of vegetarian stir-fry sauce (an alternative to oyster sauce), light and dark soy sauce, and sesame oil. The tofu soaks up all the flavours like a sponge, so you can add what ever you like to the sauce. I added a few splashes of water too as the dish was a little too dry. Remember not to over cook the vegetables as you’re looking for the crunchy texture to contrast the soft tofu!

Tofu Stir Fry with Chicken and Chorizo rice

Tofu Stir Fry with Chicken and Chorizo rice

This tofu dish can be served with plain rice or egg fried rice for a filling vegetarian meal.

If you are avoiding gluten, double check the label of the chorizo and cooking sauces for gluten. Gluten free versions can usually be found!

Macau ‘Portuguese’ Baked Rice

Following on from the previous post on Macau/Portuguese Custard Tarts I would like to share with you another dish from Macau, China.

Macau Baked Chorizo and Chicken Rice

Macau ‘Portugeuese’ Baked Chorizo and Chicken Rice

This ‘Portuguese inspired’ dish is well known throughout Macau and Hong Kong but will probably never be found in Portugal! It’s similar to a pilau,  paella or risotto, as it is mainly based but flavoured with spices and containing some form of meat/fish and vegetables. There are lots of variations to this dish but they are usually topped with grated cheese and finished off in the oven to get the crispy top. Cheese and rice may sound a little strange at first, but then again isn’t parmesan a main ingredient in the finishing of a risotto?

So this is my mum’s recipe, not sure where she got it from though… It makes enough for 6-8 people!

You’ll need 3 pans, one large casserole dish, one medium saucepan (for the chicken) and one large saucepan (for the rice)

Ingredients:

  • 4 chicken leg quarters
  • 4-5 bay leaves
  • 10 whole cloves
  • Salt and pepper to taste
  • 250g spicy chorizo (chopped into 1cm rounds)
  • 2 medium white onions (chopped into small pieces)
  • 2 tsp Oil
  • 300g white rice (washed and ready to steam)
  • 4 whole eggs
  • 100g grated cheese ( I used extra mature coloured cheddar)


Method:

  • Put chicken legs , bay leaves , a pinch of salt and the cloves in a covered pan of boiling water and simmer for 20 minutes then turn off the heat, leaving the pan to one side so the chicken soaks up the flavours of the stock. The chicken should be left to steep for at least 2 hours so it takes in the flavours. Start preparing the next step…
  • In a large sauce pan sauté the white onions for a couple of minutes in the cooking oil then add the chopped chorizo and sauté for a few minutes. The paprika from the chorizo will colour the onions nicely and the chorizo fats will also start coming out. This is good as it will help to colour and flavour the rice.
Sauted Chorizo and White Onions

Sauted Chorizo and White Onions

  • Add the washed rice to the chorizo and onion mix and enough water so that the rice can be cooked without having to drain left over water out (using the absorption method). Add salt and stir it all up so the flavours are evenly distributed.
  • While the rice is cooking, boil the eggs in their shells. Set the cooked rice and the hard boiled eggs to one side.
  • Return to the cooked chicken. Drain off the liquid discarding the bay leaves and cloves. Shred up the chicken into bite-sized chunks.
  • Fluff up the cooked rice and chorizo and put 1/3 of it into the bottom of a large oven safe casserole dish.
  • Then add 1/3 of the cooked chicken onto of the rice. Repeat the layering of the rice then chicken until you’ve used it all up.
  • Peel the eggs and cut in half  (length ways) and push them into the top of the rice so they are sunken in.
  • Scatter the grated cheese on top of the whole pot of rice and put into the oven to bake. I baked it at 200 degrees C for 15 minutes. The aim is to crisp up the rice at the top and melt the cheese, not to heat everything up as the rice should still be quite hot.
Yummy cheese ready to be melted and crispen up

Yummy cheese ready to be melted and crispen up


This dish is a meal in itself, so serve in big bowls for lunch or as part of dinner with some other tasty morsels to pick at. I served this dish in the middle of the table with chicken pot-stickers and the braised duck with pickled cucumber and spring onion pancakes so there was a variety of things to nibble on.

As the chicken is braised over a long time it soaks up the flavours from the loves and bay leaves. The rice takes on the paprika from the chorizo too so this dish is packed with mouth-watering flavour! It seems like a bit of a complicated dish to make but it’s actually quite simple, you just need to be organised with your time! I’ve seen other versions of this recipe that uses duck as the main source of protein, will try this next time…

Macau Baked Chorizo and Chicken Rice

Cheesy, crispy hug in a bowl goodness!