Chicken and Choy Sum Udon Noodles

Chicken and Choy Sum Udon Noodles

Chicken and Choy Sum Udon Noodles

Chicken and Choy Sum Udon Noodles

Chicken and Choy Sum Udon Noodles

These noodles are great for a quick mid week meal. With any ‘stir fry’ you can add whatever ingredients you like, no matter how little you have so it is great for using up left over vegetables. Udon noodles originate from Japan, are made from wheat flour, and can be bought handy in ‘straight to wok’ individual servings. As well as stir-frying you can also put them into a noodle soup so they are very versatile! Leave out the chicken or substitute with fried tofu for a filling vegetarian alternative.

Ingredients: (serves 4)

  • 3 small packets of udon noodles
  • 3 boneless chicken thighs (diced)
  • 1 white onion (sliced)
  • Small bunch of Choy Sum (chopped, separating the leaves and the stalks)
  • 2 tbs light soy sauce
  • 1 tbs sesame oil
  • Small handful of cashew nuts (lightly crushed), to serve

Method:

  • Stir-fry the chicken thighs in a dry wok, or deep frying pan, there should be enough fat from the chicken so no extra oil needed
  • Add the white onion and stir-fry until translucent
  • Add the stalks of the Choy Sum and the noodles, separating them out so they don’t clump together
  • Add the soy sauce and sesame oil, stir fry until the noodles are warmed through
  • At the last minute add the leaves of the Choy Sum, they will wilt in the residual heat
  • Sprinkle with cashew nuts when serving to add additional crunch
Chicken and Choy Sum Udon Noodles

Chicken and Choy Sum Udon Noodles


Smoked Salmon and Avocado Sushi Maki Rolls

Smoked Salmon and Avocado Sushi Maki

 Smoked Salmon and Avocado Sushi Maki Rolls

Smoked Salmon and Avocado Sushi Maki Rolls

Smoked Salmon and Avocado Sushi Maki Rolls

I really enjoy eating sushi, but good sushi in the UK is very expensive to buy. Affordable sushi is quite uninspiring so you may as well make it at home!  I’ve attempted to make sushi in the past but have always managed to ruin the rice by overcooking it. This time I tried out a new recipe and the rice came out perfectly.

  • 1 cup sushi rice
  • 2 cold cups water
  • 1 tbs sushi vinegar
  • 60g smoked salmon
  • half avocado, cut into chunky strips
  • 1 tsp wabasi
  • Nori seaweed sheets
  • Extra wasabi and sushi soy sauce to serve

Method:

  • Rinse the rice a couple of times until the water runs clear
  • Place the rice and 2 cups of cold water into a medium saucepan and place over high heat. Bring to a boil, uncovered. Once it begins to boil, reduce the heat to the lowest setting and cover. Cook for 15 minutes. Remove from the heat and let stand, covered, for 10 minutes.
  • Transfer the rice into a large mixing bowl and add the sushi vinegar and stir thoroughly to combine and coat all the rice. Allow to cool to room temperature before using to make sushi maki rolls.
  • Rolling the sushi maki rolls is quite difficult to explain in writing, so I’ve found this handy visual guide online to direct you to!  🙂
Smoked Salmon and Avocado Sushi Maki Rolls

Smoked Salmon and Avocado Sushi Maki Rolls

I used smoked salmon as sushi grade raw fish is difficult to come by in the north west of England. You can choose whatever filling you like and use as much wasabi in the rolls as you can stand. Serve with sushi soy sauce and extra wasabi.

Making your own sushi is a little fiddly and time consuming but well worth the effort. The rice should never be refrigerated as this causes it to harden immediately, so left over sushi rice should just be left in a covered bowl at room temperature.

I made this sushi make as part of an ‘Asian Inspired Afternoon Tea’ served along side ‘Braised Duck in Cucumber Cups’, ‘Thai Style Prawn Noodle Salad’ and ‘Chicken and Shitake Pot Stickers’.

'Asian Inspired' Afternoon Tea

‘Asian Inspired’ Afternoon Tea

Thai Style Prawn Noodle Salad

Thai Prawn Noodle Salad

 Thai Prawn Noodle Salad

Thai Style Prawn Noodle Salad

Thai Style Prawn Noodle Salad

This Thai style noodle salad can be served with with or without meat. The ingredients list is a extensive but it is actually a really simple and quick meal to throw together. Serve as a starter or bulk it out for a main meal. The salad dressing really makes this dish and the last minute addition of chilli and herbs takes it to another level! 😀

Thai Style Prawn Noodle Salad

Thai Style Prawn Noodle Salad

I served this noodle salad as part of an ‘Asian Inspired Afternoon Tea’ in little tea cups to replace the sandwiches that are usually served. As well as this noodle salad I also served ‘Smoked Salmon and Avocado Sushi’, ‘Chicken and Shitake Mushroom Potstickers’ and ‘Braised Duck in Cucumber Cups‘.

Ingredients

  • 12 raw large king prawns (alternatively you can use chicken or tofu)
  • 2 tbs fish sauce
  • 1 clove garlic, crushed
  • 1 tsp sesame oil
  • pinch sugar
  • juice of half a lime
  • 50g vermicelli noodles
  • 1 tsp sesame oil
  • carrots, julienne
  • cucumber, julienne
  • 1 tbs honey
  • 3 tbs peanut butter
  • 3 tbs coconut milk
  • 2 tbs fish sauce
  • juice of half a lime
  • small bunch of coriander stalks
  • handful of coriander, chopped
  • Approx 10 mint leaves, chopped
  • 2 tbs sesame seeds
  • 1 Thai red chilli, finely sliced

Method

  • Peel and de-vein the prawns, mix up the marinade (fish sauce, sesame oil, garlic, sugar, lime) and thoroughly coat the prawns. Leave in the fridge until ready to cook.
  • Immerse the vermicelli rice noodles in  a bowl of boiled water and leave until the water is cooled enough to handle the noodles. The noodles should have re-hydrated so they are bendy but not falling apart when stirred together.
  • In the meantime, make the salad dressing by putting the honey, peanut butter, coconut milk, fish sauce, lime juice and coriander stalks into a blender and whizz up until smooth. Simple! 🙂
  • Drain the vermicelli and coat in 1 tsp sesame oil to stop them sticking together.
  • Just before serving, pan fry the prawns (no additional oil required) until just cooked.
  • In a large salad bowl, toss the vermicelli, carrots, cucumber, coriander, mint and chilli together (use your hands as it’s quicker and easier)
  • Add half of the salad dressing, you may need to add more but will not need it all (serve the remainder on the table so people can help themselves to extra), add the cooked prawns and sesame seeds. Give it all one final toss with some salad spoons and serve with an extra sprinkle of sesame seeds.
Thai Style Prawn Noodle Salad

Thai Style Prawn Noodle Salad

It’s been a while since I made this salad. Since then I’ve tried it again but made a hot version by stir-frying the dressing into hot noodles, adding chicken as well as prawns. The end result was tasty, a lot richer than the salad as the noodles soak up the dressing more. Definitely a good alternative if you want a hot meal! 🙂

Braised Duck in Cucumber Cups

Braised Duck in Cucumber Cups

Braised Duck in Pickled Cucumber Cups

This is a canape version of the Duck with Hoi Sin Sauce in Pancakes often found in your local Chinese restaurant. Created as part of an ‘Asian Inspired’ Afternoon Tea. I’ve previously used a similar recipe for Braised Duck with Spring Onion Pancakes, it’s a healthier version of crispy roast duck as it does not involve deep frying. This canape version is a little fiddly but looks impressive.

Braised Duck in Cucumber Cups

Braised Duck in Cucumber Cups

Ingredients:

  • 2 duck leg quarters
  • 4 star anise
  • 4 cloves
  • 100 ml dark soy sauce
  • 50 ml of Chinese rice wine
  • 100 ml water
  • 2 tbs five spice powder
  • 2 tbs cinnamon powder
  • 1 tsp white pepper
  • 4 inch piece of root ginger smashed up
  • Large cucumber
  • 100 ml rice wine vinegar
  • 100 ml water
  • 2 tsp sugar
  • Hoi Sin sauce (to serve)
  • Spring onions, julienne (to serve)
Braised Duck in Pickled Cucumber Cups

Braised Duck in Pickled Cucumber Cups

 Method:

  • Duck: In  a large sauce pan, put all the ingredients for the duck together and bring to a slow boil. Simmer the duck legs for 10 minutes with the lid on the sauce pan and then leave to braise in the pan. The residual heat will finish off the cooking so don’t take off the lid! Once completely cooled, leave to one side until needed (Do it the day before and leave the whole pot in the fridge so the meat takes on even more of the lovely flavors)
  • Cucumber: Peel the cucumber and cut into two inch cups. Scoop out most of the watery seeds in the middle but leave the bottom intact so the filling doesn’t fall through. Combine the vinegar, water and sugar in a large shallow dish and put the prepared cucumber cups in to pickle. Leave for up to 1 hour, but longer if you want it to be really sharp!
  • To assemble:
    • Take the duck out of the braising liquid and shred the duck meat finely.
    • Pat the cucumber cups dry and assemble onto a serving dish.
    • Spread a thin layer of Hoi Sin Sauce in the bottom of each cucumber cup, then stuff a big pinch of duck into the cup.
    • Finish off with a small dollop of Hoi Sin sauce and the spring onions.
'Asian Inspired' Afternoon Tea

‘Asian Inspired’ Afternoon Tea

As mentioned above, I served these Braised Duck in Cucumber Cups as part of an ‘Asian Inspired’ Afternoon Tea where the traditional sandwiches were replaced with Asian style savory canapes. I also made ‘Smoke Salmon and Avocado Sushi’, ‘Thai Prawn Noodle Salad’ and ‘Chicken and Shitake Mushroom Potstickers’. Recipes to follow shortly! 🙂

Coconut Panna Cotta with Passion Fruit, Mango and Lime Zest

Coconut Panna Cotta with Passion Fruit and Mango: 1st Blog Anniversary Post!

First Anniversary for Tea and Sesame!

A year has passed since Tea and Sesame came into being, starting off as an idea from a casual conversation over an afternoon tea this blog has become much more than I expected; a creative outlet to share my cooking and baking with like-minded people, a way to connect with people all over the world that I would otherwise be a stranger to, and the start of a major change in direction in my ‘real’ life…

Despite promises to myself to post recipes regularly, general life seemed to get in the way. Commuting and working long hours meant weekday dinners tended to be thrown together with little creative thought process and weekends were mostly spent catching up with friends and family with the odd fancier home cooked meal thrown in… Oh how things change! This year I’ve taken the (scary) step of giving up my steady job and challenging myself to fulfill my dream of working and living overseas. Hopefully this coming year will give me time to explore a new way of living and find out what I really want to do now that I am a ‘grown up’. I’ve got a year of travelling and work planned and will be documenting my journey through this blog, so I hope you will stick around to see what I discover…

This exciting adventure started off with a couple of weeks on vacation in Sri Lanka where I was introduced to new culinary delights that I will be sharing with you soon. But first I need to catch up with some recipes that I didn’t get a chance to write up before my holiday.

This post is dedicated to Mellissa, my foodie companion and inspiration for this blog. She is addicted to anything that contains coconut and like me needs a decent dessert to make a good meal complete… Enjoy! 😀

Coconut Panna Cotta with Passion Fruit,  Mango and Lime Zest

Coconut Panna Cotta with Passion Fruit, Mango and Lime Zest

Coconut Panna Cotta with Passion Fruit and Mango

Ingredients:

  • 1 can coconut milk
  • 150 ml double cream
  • 2 heaped tbs icing sugar
  • 3 leaves of gelatin (use agar agar for vegans)
  • Pulp of 3 passion fruits
  • Cubes of fresh mango
  • Zest of one lime

Method:

  • Pour the coconut milk, double cream and icing sugar into a sauce pan and gently warm up, turn off the heat as soon as it starts to simmer and do not allow it to come to a boil!
  • Prepare gelatin as instructed on the packet, then stir into the warmed liquid
  • Pour into small bowls/moulds/ramekins (whatever you want to serve them in) and put into the fridge to set (at least 2 hours for me)
  • When ready to serve, top with passion fruit pulp, cubed mango and lime zest
Coconut Panna Cotta with Passion Fruit,  Mango and Lime Zest

Coconut Panna Cotta with Passion Fruit, Mango and Lime Zest

This dessert takes minutes to put together and is so easy to make but tastes so amazing! I served is as part of an ‘Asian inspired’ Afternoon Tea to celebrate a friend’s 30th birthday so served them in little shot sized cups, but you can make larger ones for a dinner party.

Coconut Panna Cotta with Passion Fruit,  Mango and Lime Zest

Coconut Panna Cotta with Passion Fruit, Mango and Lime Zest

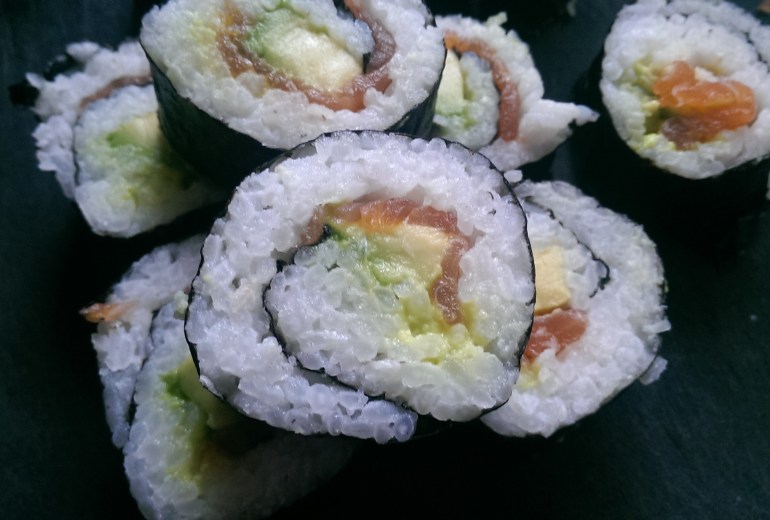
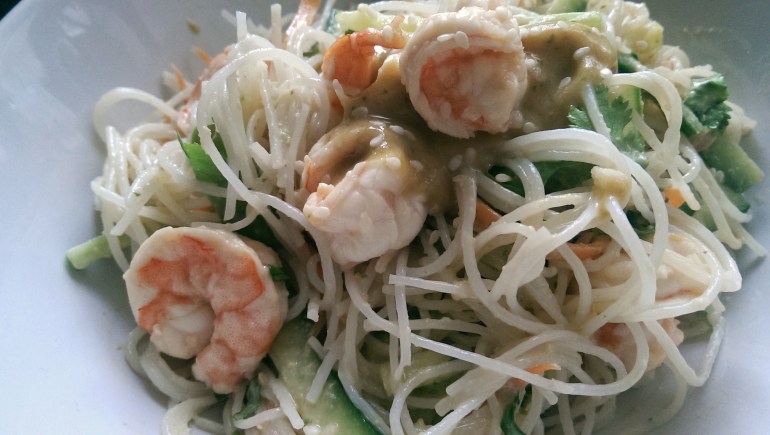
The ‘Asian Inspired’ Afternoon Tea also consisted of Cardamom and Salted Caramel Profiteroles, Candied Walnut Carrot Cupcakes and Scones. Recipes to follow…

'Asian' Afternoon Tea

‘Asian’ Afternoon Tea